

West Heath - Nikon 35mm / B+W #22 (Orange) - 1/200th, f/8, iso 100
It's finally time for me to talk about my current infra-red project. This Sony A7 camera has been converted to 'Full Spectrum' by ACS, but although it's capable of shooting colour and UV it's still infra-red that's my primary focus. This page has now been updated with more information about filters and some more examples from my first 3 weeks with the converted camera. For those of you who aren't familiar with what a full spectrum conversion is, here's a quick explanation:
Explained
All digital cameras have a filter in front of their sensors called a 'low-pass' filter. This blocks most of the ultraviolet and infra-red light from being captured, which improves colour accuracy and reduces numerous aberrations. Converting a camera involves replacing this filter with (what is essentially) a piece of glass. Here's a diagram that shows why a normal digital camera, using an infra-red filter on the front of the lens, doesn't get very much light and is stuck with long exposure times:

With the 'low-pass' filter removed - UV or IR 'pass' filters can then be added externally to let in significantly more invisible light. Exposure times for UV and/or IR photography can then be fast enough to allow images to be taken without a tripod.
Full Spectrum - Then & Now
Full spectrum is nothing new, but in the early days of digital - converting a DSLR didn't make photographing UV or IR very friendly. It still required the use of a tripod, due to opaque external filters blocking the viewfinder. Compact cameras fared better, but historically have been limited to smaller image sensors and poor displays. When 'live-view' was added to digital SLRs this caught them up to compacts, but this still only provided low resolution screens that were difficult to visualize accurate focusing. They were also easily washed out from bright reflections in good lighting conditions.

Sony A7 & Voigtlander lens, with UV/IR blocking filter (for taking colour photos)
The Benefits of Mirrorless & EVF
The wonderful thing about the Sony A7, A7R & A7S is that they combine a relatively high resolution electronic viewfinder (EVF) with a full frame sensor and a highly versatile lens mount. Optical viewfinders (OVFs) may still have the edge in quality and speed (at the moment), but since using cameras with EVFs I've noticed several advantages and some of these are indispensable for shooting infra-red (highlighted in green).
- The camera is significantly smaller & lighter (compared to a DSLR)
- The viewfinder doesn't shrink when using crop lenses
- The possibility of light leaking is greatly reduced
- You can't blind yourself when looking into the sun
- Super-imposed horizon level (don't know what I did without this)
- The colours and tones of the spectrum you're shooting in can be seen in real-time
- Correct exposure & White balance can be seen in the viewfinder
- True focus can be viewed and zoomed in on (Great for Infra-red)
Cons
The flexibility of shooting whatever spectrum you choose whenever you want is great, but... Internal filters offer better image quality (because they're closer to the sensor), so if you want to mostly shoot infra-red I highly recommend converting your camera to full-time IR. Using an internal filter like a 665nm, 695nm or there about. That way you can still add more aggressive filters externally for pure black and white.
Another potential down side is that shooting colour won't be as easy as it was (before conversion). Colours don't come out as they did when using Hoya or B+W external UV/IR blocking filters. A simple tweak of the white balance just won't cut it with most images and retrieving warm colours from night shots will require a lot post-process if you're picky. There could be better UV/IR block filters available. I'm looking in to this, but don't have any evidence that they're as good as people say they are yet and cost can be an issue.
Pre Conversion
I kept the A7 for a week before sending it away for conversion. This gave me the chance to see if everything was OK and also take some shots for later comparison. Here are some random samples (pre-conversion):
Kew Gardens, Richmond - Golden Peacock - Nikon 85mm
The flip out screen was amazing for this shot. I simply could not have captured this without it. It's not that I'm against rolling around in the dirt, but if I had it would have frightened the glorified chicken away.
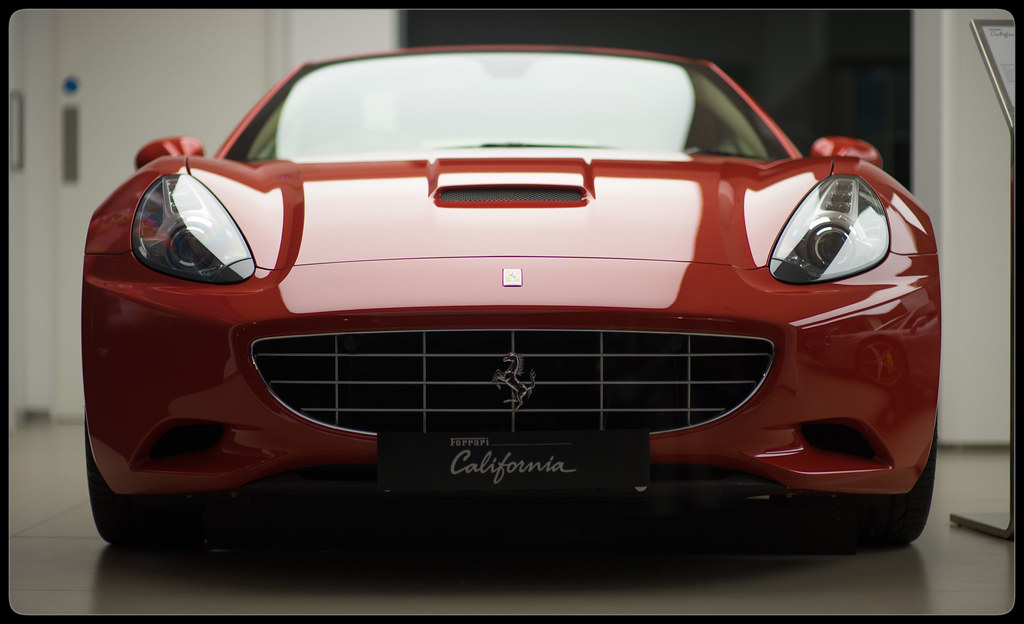
Knightsbridge, London - Ferrari Dealer - Nikon 85mm
Both of these images were taken using focus peaking with the Nikon 85mm f/1.4 lens. They are right on the edge of a decent exposure, considering I was trying to keep the camera at base ISO. It seems like reds are the hardest thing to get right post conversion, but more about that in later post, for now it's time to focus on the infra-red aspects of this camera.
The noise levels from the A7 are not the best ever, but they're not terrible, better than anything I've had before and I'm sure it will cope very well with hald-held infra-red photography. The recently announcement for the Sony A7S makes me rather jealous that I didn't wait (as it would probably be a few stops better at high-ISO), but mostly I'm happy that this converted A7 is ready for early spring :).
Filters
Here is a scene taken with the nine different filters I have so far. This should give a rough indication of what colours to expect with each filter and how each affects the exposure values.
There are a couple of things to note before reading too much into these images.
- These filters will not perform similarly on non-converted digital camera, or even on one that's been converted to infra-red. For example: A red filter on a normal digital camera will simply make red images and it will do nothing at all on one that's been converted to IR only.
- Infra-red images are generally heavily processed, so this does not represent the full potential of each filter. This is a starting point from an auto white balance. I will dedicate a post to the processing of colour infra-red images as I don't want to overwhelm this post with that technicality. ** If you're reading this and you would like help with achieving a specific effect please feel free to leave a comment in the space below.
I will start off by showing an image that's been taken without any filters (Full Spectrum) and then go through each of the filters (stating it's brand, type, exposure setting and white balance figures). Before I show them, however, let me explain a bit about my test set up and the processes I've adhered to:
- All shots were taken on a tripod, using a Nikon 35mm f/2 AF-D lens
- Cameras setting were: Aperture Priority, f/11, iso 100 and +1.3 eV
- Custom white balance was set for each filter (directly from this scene)
- White balance temperature wanted to be below 2000 for all shots
- Images are taken from RAW, but no adjustments have been applied
- Focus was not changed, so these don't make good sharpness examples

▲▲ Full Spectrum (No Filter) - 1/500th, WB: 2000 / -93 ▲▲

▲▲ Colour (Hoya UV/IR-Cut) - 1/250th, WB: 2500 / -82 ▲▲

▲▲ Colour (B+W UV/IR-Cut) - 1/250th, WB: 2600 / -79 ▲▲

▲▲ Orange #22 (B+W) - 1/250th, WB: 2000 / -47 ▲▲

▲▲ Red #25 (Heliopan) - 1/200th, WB: 2000 / -73 ▲▲

▲▲ 665nm Infra-red (Schott) - 1/160th, WB: 2000 / -81 ▲▲

▲▲ 695nm Infra-red (Heliopan RG695) - 1/125th, WB: 2000 / -84 ▲▲

▲▲ 720nm Infra-red (Hoya R72) - 1/100th, WB: 2000 / -94 ▲▲

▲▲ 850nm Infra-red (B+W 093) - 1/50th, WB: 2000 / -150 ▲▲

▲▲ 360nm UV+IR (Hoya U-360) - 1/25th, WB: 2000 / -57 ▲▲
If you look at these examples and feel like there's not much to take away from them let me share some thoughts I've had while using these filters:
Full Spectrum can be pretty and it gives about an extra stop of exposure, but it has ghosted/blurry corners from the varying focus distances and offset detail in the colour channels. This can destroy much of the fun that you might have seeing the world in this way, so in reality it isn't all that great to shoot with very often. Even if you're not keen on the colours you could use full spectrum for shooting at night with wide aperture lenses. This hides most of the corner issues and differences in colour, so you could simply use the extra stop of exposure.
Orange and Red filters can give some really nice effects with some processing experimentation, but they suffer a little from the same effect as full spectrum in the corners and it can look more obvious with the limited colour pallet too. Red does show less of these aberrations though so if you really like the more obvious colour separation that's the one I would recommend if you're looking for detail and funky colours. That said - I managed to get the orange filter to give images with blue skies and red trees without the 'false colour' technique, which was easier and gave interesting results.
Infra-red filters with lower cut-off points in the spectrum, like the 665nm (which lets in quite a bit of red) can give slight corner aberrations, but they offer a good amount of play in the colours through processing and the exposure times with these filters are barely diminished compared to colour.
Infra-red filters with higher cut-off points in the spectrum reduce more and more visible colour information as they go. They get sharper and have less contrast too, but their exposure times suffer. At 800nm it's unlikely they will show any colour at all. Actually colour information is all-but invisible to humans at 750nm, but a filters rating is not a hard cut off point and they can start letting in light 50-100nm lower than their rated figure. The 850nm filter you see above is as near to pure infra-red as you'll get without being too crazy.
Ultraviolet filters like the Hoya U-360 also let in a lot of infra-red and their tones are overpowered by IR. They are actually great for taking IR images with naturally blue skies, but if you want pure UV tones you'll need to stack another filter in front of it (IR block).
Image Quality: All the filters I've used above (Hoya, B+W, Heliopan and Schott) have very high quality glass. I haven't noticed any issues with these, but I have had poor quality unbranded filters in the past. I wouldn't recommend everyone stick to these, but it is safer. I will be doing a sharpness test between these filters soon, to see if I can see any difference between them.
Exposures
Following on from the diagram I made at the beginning of this post - I will try to illustrate just how much difference converting a camera makes with infra-red exposures on modern digital cameras.

Nikon D600 / Nikkor 105mm - 1/800th sec, f/3, iso 100
The Nikon D600 sensor is the same one that's used in the Sony A7, so this makes for a good test. Although Nikon's processing provides better high-iso noise quality.
Normal colour photos like this, taken in direct sunlight tend to have clipped values. This image has had the contrast lowered as well as shadow and highlight retrieval applied (in RAW) to keep it from looking overly harsh.

Sony A7 / Nikkor 85mm - 1/320th sec, f/2.8, iso 100 (B+W 093 IR filter - 830nm)
The B+W 093 filter is quite aggressive, passing 50% light intensity @ 850nm. Unlike the Hoya R72 there is little to no colour information captured here. By comparing the exposure values this filter only loses about 1.5 stops of exposure compared to a normal colour camera, which makes it a breeze to use. Dynamic range is almost always captured without clipping. The contrast in this image has actually been increased to maximise the shadow and highlights. With base iso easily achievable there's little noise (if any) when adjusting exposure values in post (RAW).

Nikon D600 / Nikkor 85mm - 1/10th sec, f/1.4, iso 25600 (B+W 093 IR filter - 830nm)
Keen observers will notice that the glasses are different here (these lenses are normally transparent). Sorry, this was a from a bit later in the day, but the light levels were very similar. Otherwise this is the same lens and filter as the Sony image (previously), but we're back to the (normal) Nikon D600 again. This was my attempt at a hand-held infra-red photo using this non-converted camera.
The exposure difference between the two cameras is nearly 16 stops, but since the IR filter being used here is already 1.5 stops slower than colour, that's an effective loss of about 17 stops. To get this shot on the Nikon I had to guess the focus distance and framing (live-view screen was completely useless). The haze that you see across the middle of the frame is light leaking through the optical viewfinder. This is another sign that the camera is really struggling to see anything (although covering it up works fine). Getting a reasonable shot here was a difficult task.
This level of aggressive blocking from the internal filter is enough to make a modern non-converted camera completely unusable without a tripod, but not all cameras are like this. To see a modern camera that can be used to shoot hand-held IR see my post on the Fuji X100 here.
Lenses
Disclaimer: I am a big fan of available light & low light photography, I'm also a total bokeh whore. I can be quite forgiving of pixel peeping sharpness and aberrations because I'm more interested in the image as a whole. I generally seek out the widest aperture lenses available, so Sony's current range of full-frame E-Mount lenses (mostly Zeiss at the moment) don't really suit my needs. What interests me most about the lens mount of the A7 is its ability to adapt almost any other lenses to it. Since I already have some great glass and I don't mind manually focusing it was obvious what lenses I should use with the A7 first.
I bought the A7 with its kit lens, which is currently the only non-Zeiss lens available (28-70mm). This is a very cheap option, but this is another huge lens that rather destroys the great size of the A7 for me. Image quality was OK, but understandably not stunning. Image stabilisation actually destroyed some of my images and turning that off could only be done in the menu. This was the final straw for me so I got rid of it and initially concentrated on my existing SLR lenses from Nikon.
After being completely smitten by the Fuji X100 for about a year I really wanted something just like that, but for full frame. The Zeiss 35mm f/2.8 lens would be a perfect option, but it was just too much for me to spend after buying the camera and having it converted. In hindsight perhaps a nicer option would have been the Canon 40mm f/2.8 pancake combined with the metabones autofocus adapter, but my first choice was this...

Voigtlander Nokton Classic 35mm f/1.4 (Leica M mount)
If you're being critical about sharpness and aberrations this lens will not impress you, but I don't mind these things and really quite enjoyed it for colour work. Unfortunately for IR images it was rather lacklustre and on top of that it produced bad hot-spots and extreme flaring, so I wouldn't recommend it for IR photography.

Nikkor 35mm f/2.0 AF-D
Not that small, but still very light. IQ performance is superb in infra-red, with no hint of hot-spot or crazy flaring. The close minimum focus distance allows for some nice shallow depth of field @ f/2.0 with portraits / flowers and the common 52mm filters will fit on many other lenses. Focus ring is easy to knock, but still - highly recommended!

Nikkor 85mm f/1.4 AF-D
My favourite lens for colour and is quickly becoming so for infra-red too. It's a bit unwieldy to carry on the A7, but in use it's fine. It shows no sign of hot-spots or excessive flaring in IR. This lens has come down in price a lot lately, but it's still not down to the levels of the very capable Samyang 85mm f/1.4, although I don't know how that does with IR.
Nikkor 50mm f/1.4 AF-D
Mini review coming soon...
Nikkor 105mm f/2.8 Micro AF-D
Mini review coming soon...I will be testing the Sony A7 with many more lenses soon and when I do I will update this space with a mini review of how they cope with infra-red. Next up (after the remaining Nikon lenses) is the Mitakon 50mm f/0.95, fingers crossed that it copes with infra-red better than the 35mm Voigtlander.
Post Conversion
Now that I've had the Sony A7 back in my hands for a few weeks, let me show you a few of the infra-red images I've taken with various filters. There isn't any examples from the Voigtlander here I'm afraid. This was due to it not being well suited for infra-red. It's now gone to a better home...

Hampstead Heath - Nikon 35mm / Schott IR 665nm - 1/320th, f/8, iso 100

Hampstead - Nikon 85mm / B+W 093 - 1/160th, f/1.4, iso 100

Kew Gardens - Nikon 85mm / Red (#25) - 1/3200th, f/1.4, iso 100

Hampstead Heath - Nikon 85mm / B+W 093 - 1/1600th, f/1.4, iso 100

Highgate - Nikon 35mm / Hoya U-360 - 1/200th, f/2, iso 100

Kenwood House - Nikon 35mm, Hoya R72 - 1/160th sec, f/11, iso 100

Kew Gardens - Nikon 85mm / Red (#25) - 1/2000th, f/1.4, iso 100

Hampstead Heath - Nikon 85mm / B+W 093 - 1/100th, f/1.4, iso 100

Hampstead Cemetery - Nikon 35mm / Red (#25) - 1/160th, f/8, iso 100

Kew Gardens - Nikon 35mm, Heliopan RG695 - 1/400th, f/8, iso 100
Focusing
Manually focusing lenses on the A7 is pretty easy with focus peaking. The only negative is that when using this in infra-red it's slightly less responsive, perhaps due to infra-red having less contrasted tones. It's not too different however and is still a very useful addition.
Focus checking could be great if it was a little different. Currently you activate it by pressing a button once and then again to confirm which area you want to zoom in on. This is really unnecessary since you will only want the middle 99% of the time. This lasts only for a couple seconds and then automatically goes off, making it very frustrating to use, as this process has to be repeated until you're sure focusing is correct. With only a few small changes it could be vastly improved. A button that you could simply hold to zoom would be all you really need here, so I really hope that an option for this is added with a firmware upgrade.
As for autofocus I really can't offer much insight yet because I got rid of the kit lens before I had the camera converted. I will update this section once I've had some experience with some Sony and/or Canon lenses.
Summary
Overall I am extremely happy with the Sony A7. It's a great little camera with a lot of scope for creativity. The lens compatibility is probably my favourite aspect. A few weeks on (after conversion) it has surpassed my expectations. As a choice for this infra-red project the Sony A7 has been great, but there are a couple of things that I'd like to see improved. Here's a few negative bullet points about this camera (rated out of 10 for annoyance):
- Body is a bit plasticy and feels fragile (although it's nice and light) - 3
- Battery life is very short (although, again, this helps the cameras be nice and light) - 5
- LCD screen is always exposed leaving it open to damage (but it's quick to use) - 2
- Confusing buttons and uncomfortable layout - 7
- Menu and C2 buttons very hard to press - 5
- Custom button options need work * - 8
* Custom button functionality is a great feature and there are several buttons available to customise here. The down side is a lack of useful finctions available to assign to these buttons and this is rather frustrating. It has some nice options, but most of what I wanted just wasn't there at all. I would really like the following features (rated out of 10 for potential usefulness):
- Switching between LCD, EVF and Auto view would be great. Currently you can only assign a button to turn off the LCD, but it only switches off the feed (the back-light stupidly stays on) - 10
- Auto ISO toggle button (this is even more useful than a hardware ISO dial) - 9
- Focus check as a toggle for quick operation. Currently this is a two button press - 8
- The ability to change the minimum shutter speed before ISO values drop (1/60th only is pretty useless for me because I either shoot with a 35mm or 85mm lens) - 10
OK that's enough bitching, here's the parts that I do like (rated out of 10 for awesomeness):
- 1/8000th shutter * - 10
- Very generous buffer considering it's an entry level model * - 10
- Rotating screen is great for low angle shots - 10
- Nicely placed video button for still photographers. Out of the way, but easy to get to - 7
- Video starts recording with one button press & in any mode - 9
- The ability to output uncompressed video - 9
- Can mount many types of SLR lens (Nikon, pentax etc.) in manual focus - 10
- Can mount Canon lenses while retaining autofocus (using not so cheap adapters) - 10
- Can mount Leica or Contax lenses (using small adapters) - 10
- Focus Peaking for manual lenses - 8
- Rear dial is also a directional switch and works well - 8
- Exposure compensation dial has nice friction - 9
- Exposure compensation works in Manual mode (with ISO) - 10
* The Nikon D600 is more expensive and has neither of these things!
OK, that's enough for now. I will follow this up with tutorials for processing colour infra-red images (from different filters) and the in-depth lens reviews (how well they work in IR). If you have any requests for me to test certain things or make tutorials for any of the processing please feel free to write a comment below.
OK, that's enough for now. I will follow this up with tutorials for processing colour infra-red images (from different filters) and the in-depth lens reviews (how well they work in IR). If you have any requests for me to test certain things or make tutorials for any of the processing please feel free to write a comment below.


